Back to Blog


Oracle 23ai Support Extended
The latest long-term release of Oracle 23ai now has the premier.


In this second blog covering AWS RDS Custom, you will learn how you can create a true, warm standby database on AWS RDS Custom on Oracle SE, using Dbvisit StandbyMP. This blog overviews the steps to deploying StandbyMP on RDS Custom, showing how quick and intuitive it can be to create a warm standby database!

Well, StandbyMP creates a true warm standby database that can be out-of-region, whereas Multi-AZ for Oracle SE uses in-region storage replication.
The warm standby created by StandbyMP has three main benefits:
(1) Increases the resiliency of the database by enabling it to be hosted in an out-of-region data center protecting you from in-region downtime;
(2) Increases flexibility and configurability such as point-in-time restoration;
(3) Enables DR testing / read-only queries not available on Multi-AZ for Oracle SE.
You can read more about the benefits in our blog “Introducing StandbyMP for Oracle SE on AWS RDS Custom” and StandbyMP for AWS Webpage.
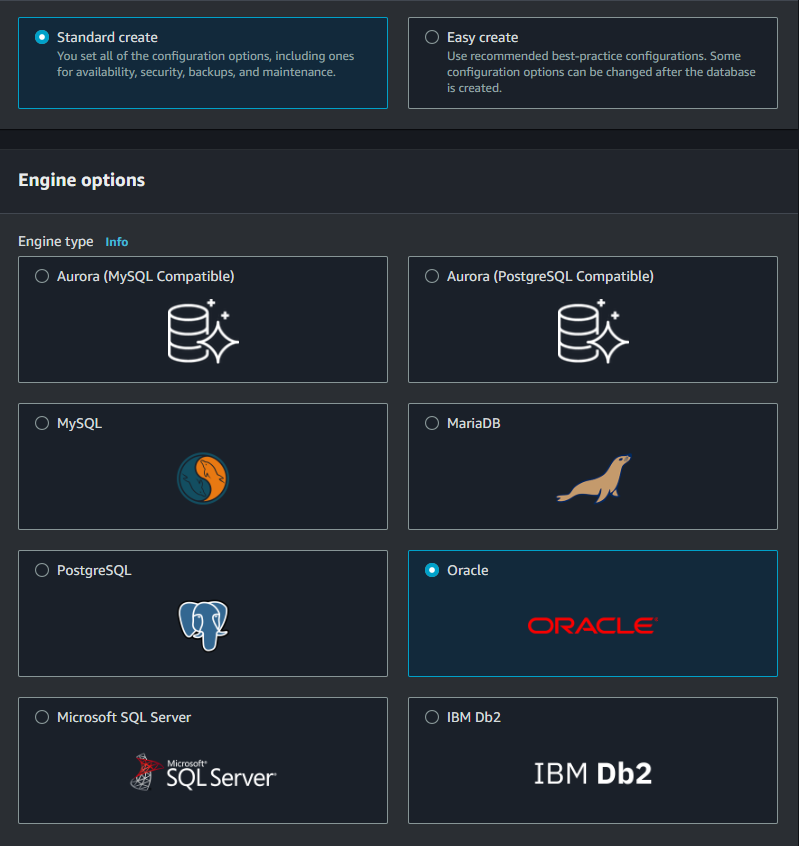
From the AWS Console, navigate to RDS and then click Create Database. Use the ‘Standard create’, as we want to configure each step in this process and select ‘Oracle’.
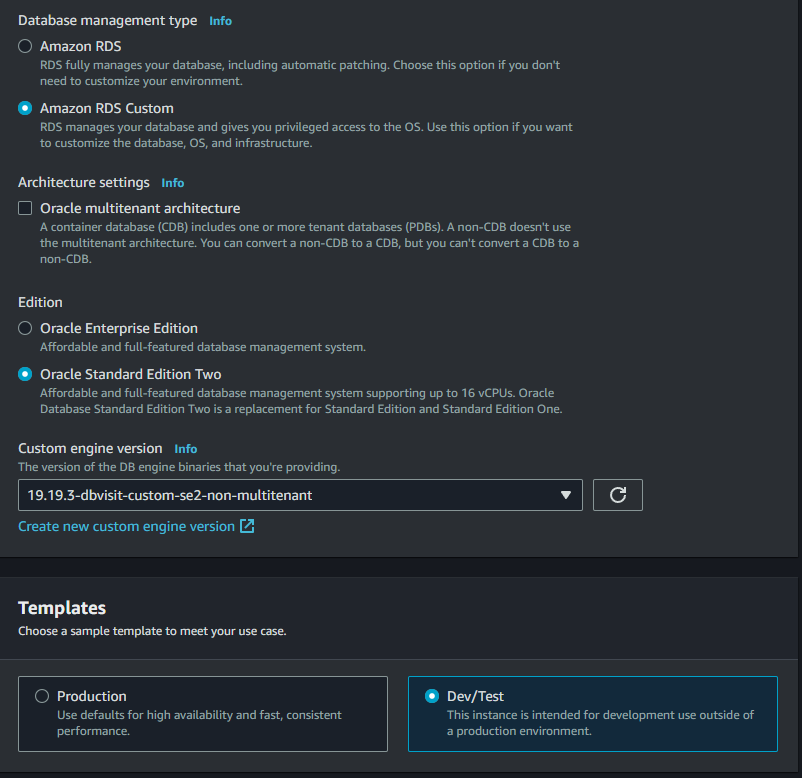
After choosing Oracle, this will show you the options of choosing Amazon RDS or Amazon RDS Custom. Here choose Amazon RDS Custom and in the edition choose Oracle Standard Edition Two (SE2). The next thing is to build a custom engine version of the latest Oracle release (at the time of writing this was Oracle 19.19).
We exactly followed the steps provided in the AWS link below:
Preparing to create a CEV - Amazon Relational Database Service
We were doing this as a Dev/Test environment that was for only non-production purposes.
DB instance name
Next, provide the name for the DB instance and also the admin user to login to the database. The credential has to be self-managed as RDS Custom does not support credential management.
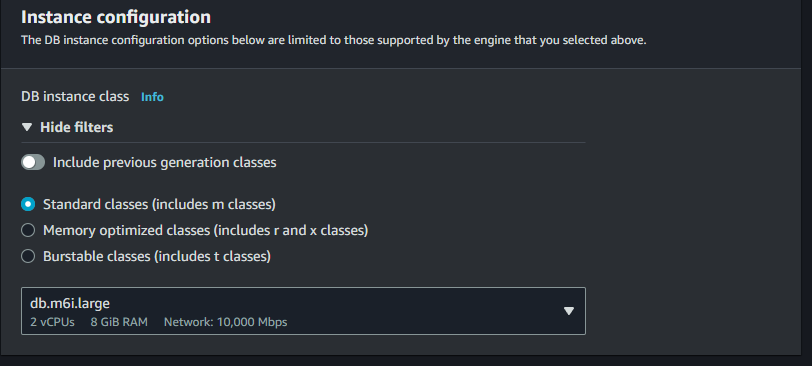
Select your machine configuration
Now it's time to choose your infrastructure configuration. For this test, I chose db.m6i.large (2vCPU and 8GB RAM), a standard class machine.
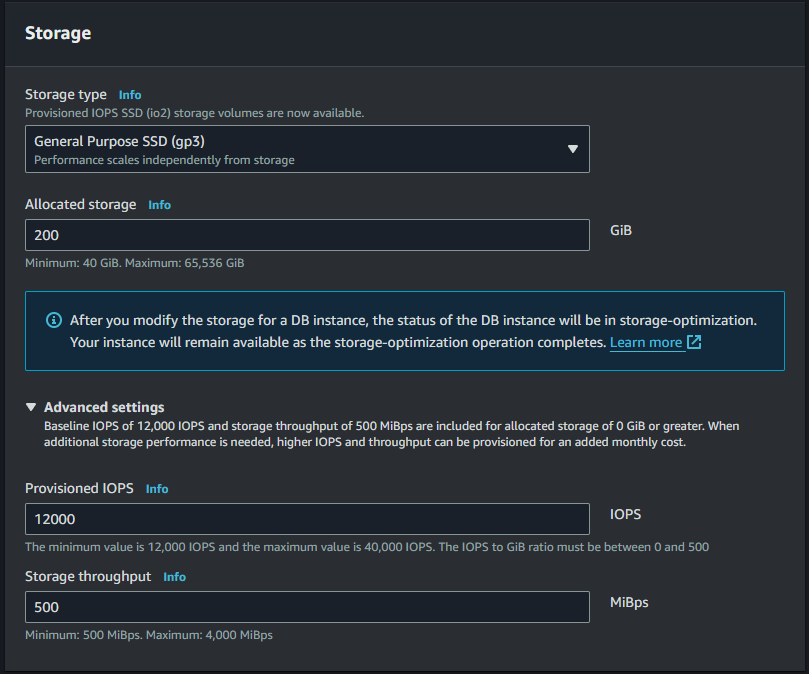
Ensure you have sufficient storage added to the instance. The IOPS and storage throughput can be configured, but we left it to default.
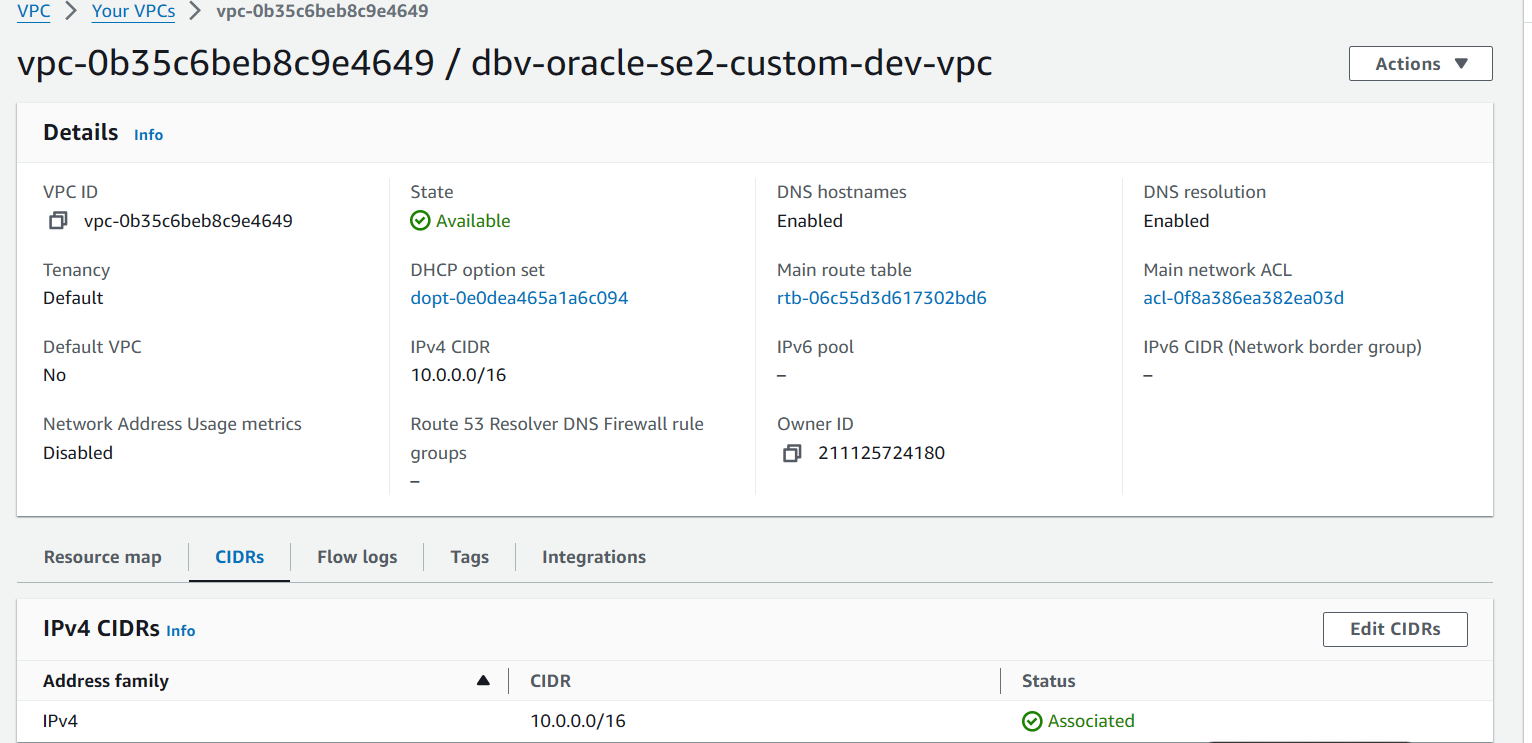
Choosing your Virtual Private Cloud (VPC)
The next step is to choose a VPC or create one. See the screenshot for details.
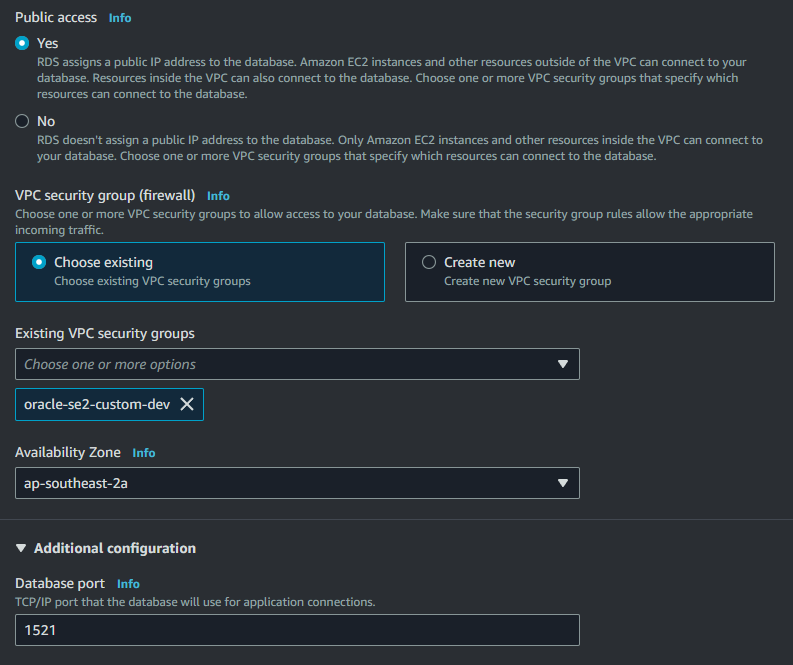
Assigning an IP address and configuring security
It's important to ensure that a public IP address is assigned so that any other outside resources can connect to the database instance. Also, ensure that the security group only has the necessary traffic for this instance.
For this example, we configured ports 1521 for the Oracle database connection and also ports 7890, 5533, and 4433 for the Dbvisit standbyMP configuration.
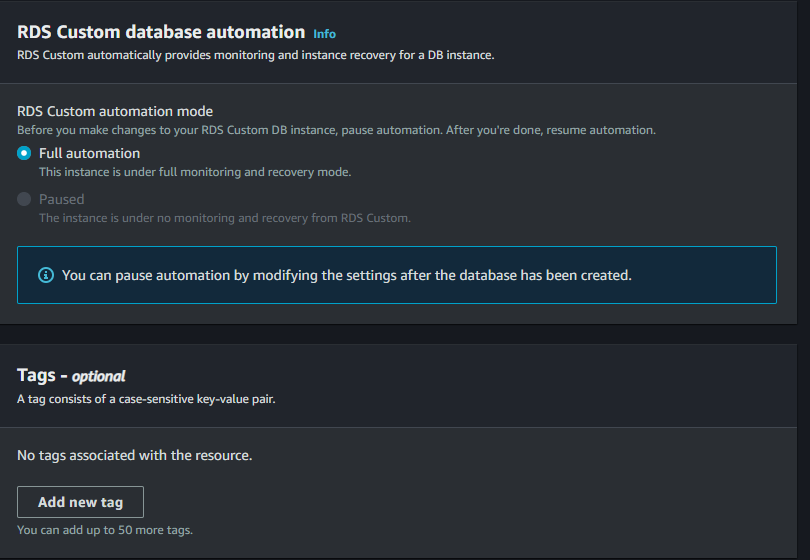
Configure automation
Select full automation
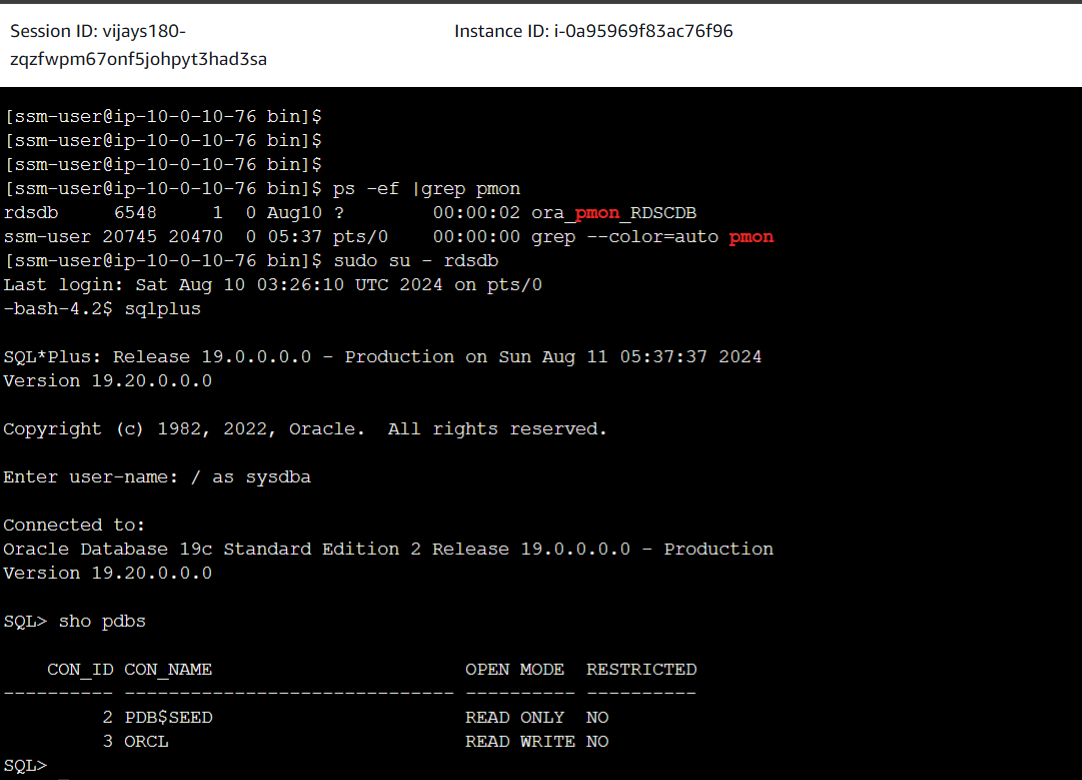
Confirm the instance is accessible from the AWS console
Once the instance is created, using the session manager from the AWS EC2 page, confirm the instance is connected.
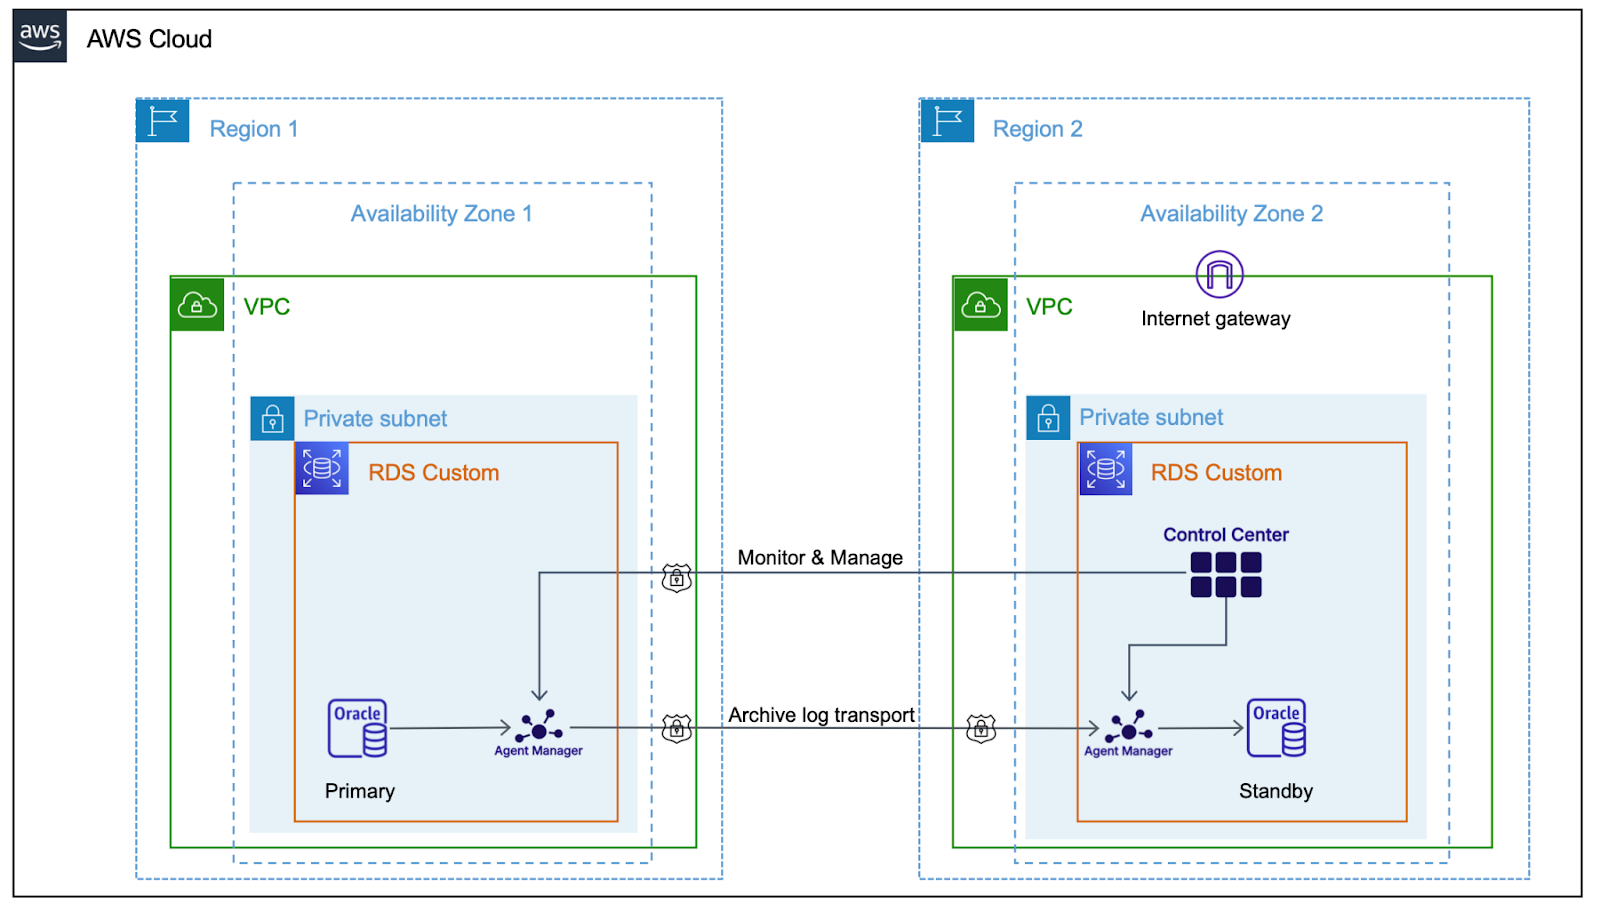
An overview of the architecture
StandbyMP enables the creation and management of a warm standby database two key components. An agent is installed on each of the database VMs and a control center is installed on a separate EC2 VM. The agents communicate with the StandbyMP control center, and between themselves to transfer archive logs between the primary and standby databases.
Installing the Agent Managers and Control Center
Full details of this process can be found in the Installing StandbyMP documentation: https://dbvisit.atlassian.net/wiki/spaces/DSMP/pages/3242000447/Installing+Standby+Multiplatform
bash-4.2$ ps -ef |grep dbv

rdsdb     6017 23277  0 Aug09 ?        00:00:16 /rdsdbdata/dbvisit/standbymp/bin/dbvhelper -agentManagerId
3oychmd4s3l5 -directorId 3rxxfok6zctlm -hostAddress ip-10-0-10-76.ap-southeast-2.compute.internal -natsAddress ip-10-0-9-20.ap-southeast-2.compute.internal -natsPort 5533 -configurationType Oracle -helperProcessKey oracle:3oychmd4s3l5

rdsdb     8683  6017  0 Aug10 ?        00:02:26 /rdsdbdata/dbvisit/standbymp/oracle/dbvctl                      -d RDSCDB -D run --mode GUI

rdsdb    23277     1  0 Aug09 ?        00:00:20 /rdsdbdata/dbvisit/standbymp/bin/dbvagentmanager service run

rdsdb    28903 20764  0 05:44 pts/0    00:00:00 grep --color=auto dbv
rdsdb    32391  6017  0 04:53 ?        00:00:01 /rdsdbdata/dbvisit/standbymp/oracle/dbvctl                      -d RDSCDB --listener start --mode GU
Standby:
[ssm-user@ip-10-0-9-20 bin]$ ps -ef |grep dbv

rdsdb      825     1  0 Aug09 ?        00:00:38 /rdsdbdata/dbvisit/standbymp/bin/dbvagentmanager service run

rdsdb     1154     1  0 Aug09 ?        00:01:03 /rdsdbdata/dbvisit/standbymp/bin/dbvcontrol service run

rdsdb     8604   825  0 Aug09 ?        00:00:17 /rdsdbdata/dbvisit/standbymp/bin/dbvhelper -agentManagerId nm6clvbv4psa -directorId 3rxxfok6zctlm -hostAddress ip-10-0-9-20.ap-southeast-2.compute.internal -natsAddress ip-10-0-9-20.ap-southeast-2.compute.internal -natsPort 5533 -configurationType Oracle -helperProcessKey oracle:nm6clvbv4psa

ssm-user 10471  8101  0 05:45 pts/0    00:00:00 grep --color=auto dbv

rdsdb    27450  8604  0 05:32 ?        00:00:01 /rdsdbdata/dbvisit/standbymp/oracle/dbvctl                                -d RDSCDB --listener start --mode GUI

[ssm-user@ip-10-0-9-20 bin]$
1. Before creating the standby, we recommend you confirm the below Oracle init parameters were reset as the RDS Custom default parameters belong to Enterprise Edition and not Standard Edition. I also removed these parameters for the primary.
db_block_checking
dg_broker_config_file1
dg_broker_config_file2
Also, for primary change the archivelog destination from log_archive_dest_1 to db_recovery_file_dest.
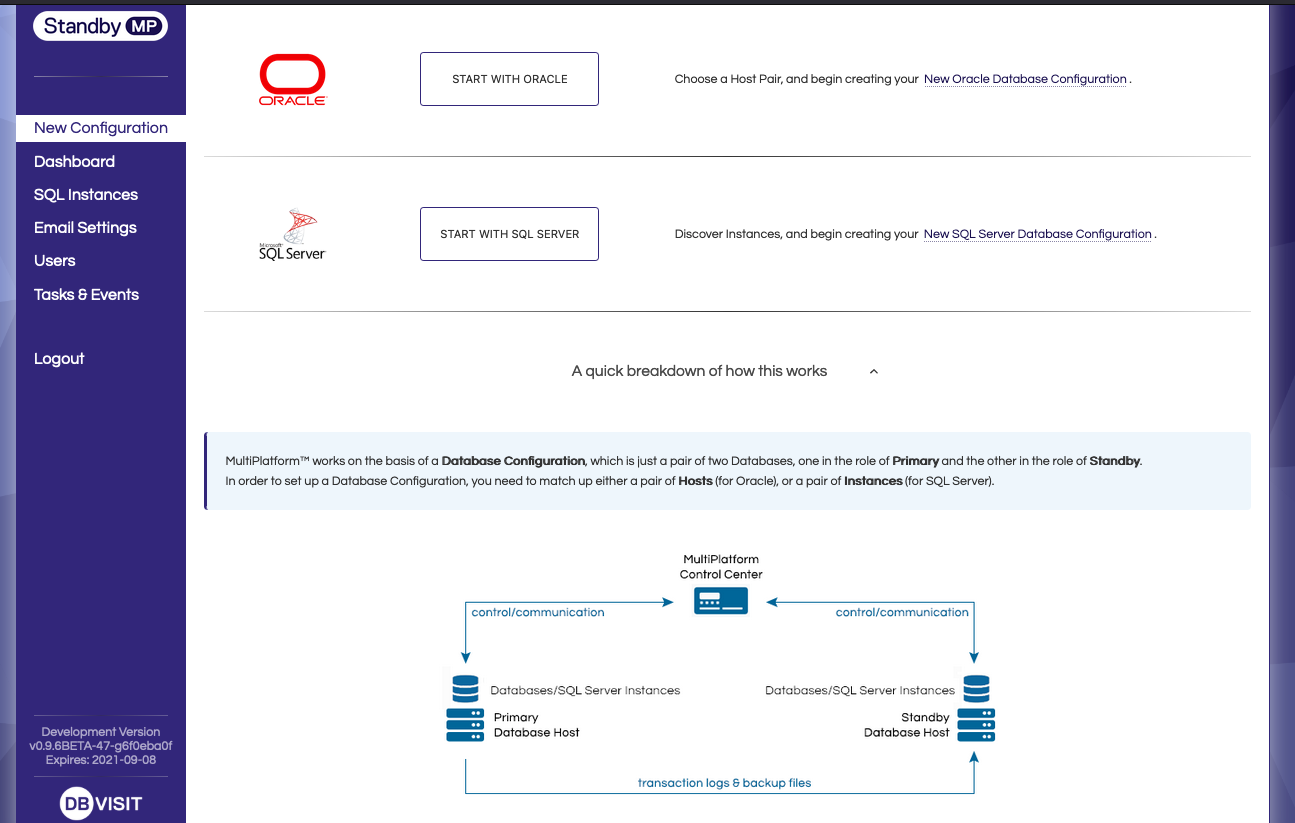
2. Access the StandbyMP Control Center GUI directly from the public IP address of the standby server.
3. Create the standby database from the StandbyMP control center.
(A detailed explanation of creating the standby database can be found in our "Create DR Database for Oracle documentation").
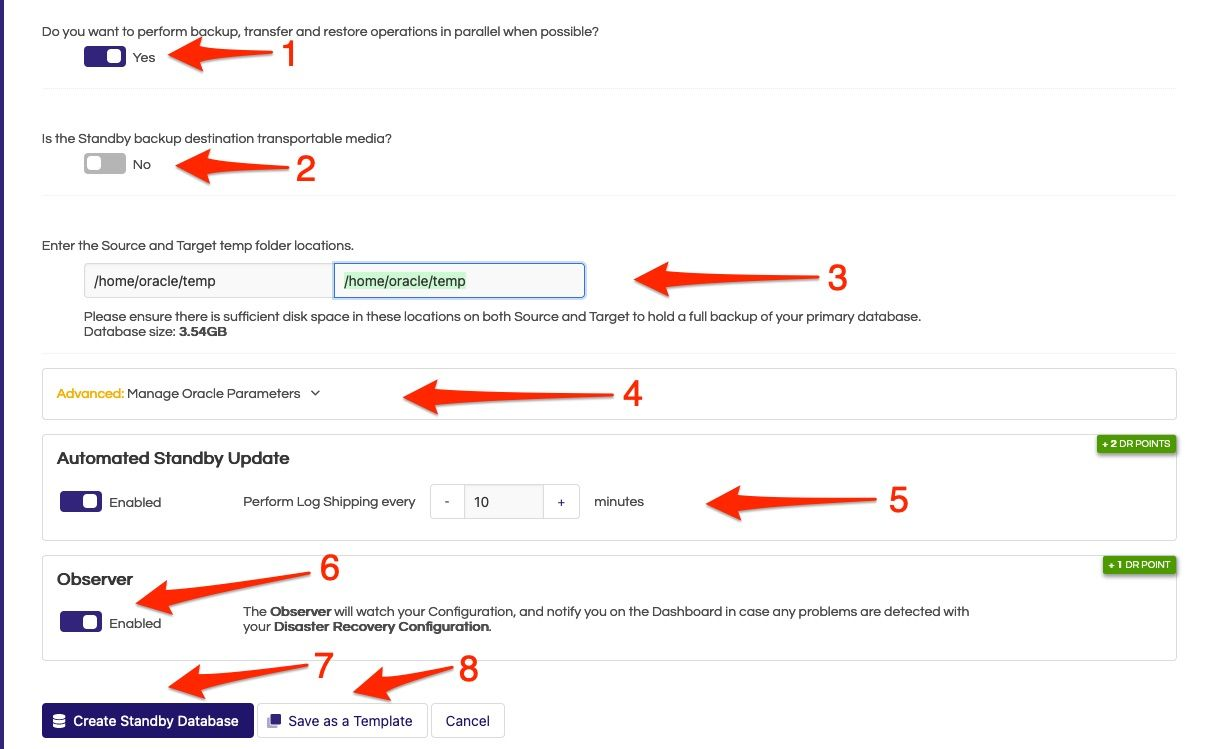
Recommended defaults:
You have created a warm standby database that will be continuously updated and monitored by StandbyMP. You can now utilize this standby for DR Testing, Queries (when put into read-only mode), zero-data-;oss Swichovers, and forced Failover.
If you have any questions about this solution, we’re always available to talk through your situation and provide further information, provide a demo or assist you in a POC.