Back to Blog
Announcing StandbyMP 12.3
StandbyMP 12.3 delivers significant improvements in performance and.


Here is Part 3 of our series taking you through Oracle Database 18c Express Edition (18c XE) and getting started with running it in a Docker container.

This post is the 3rd in the series so far, taking you through Oracle Database 18c Express Edition (18c XE) and getting started with running it in a Docker container. We recommend you review the previous posts before you continue with this post. The previous posts can be found here: Part 1 and Part 2.
If you have been keeping an eye on the latest Oracle database releases, you would have seen that Oracle Database 19c is now available for Linux and Solaris SPARC - and as we were keen to get a quick look at 19c, we got it running inside a Docker container and within a short timeframe had a system that could be played with. More on this in a future blog post. For more detail on 19c, please see here. Now the 19c Express Edition is not yet available, but as mentioned in the earlier posts there were comments made that 19c XE will be made available later this year.
For now, let's get back to 18c XE and Docker. In previous posts, we started with an introduction and only scratched the surface of Docker. If you are keen on learning more about this technology, keep an eye out for the Docker Conference (Dockercon) 2019 key session videos on Youtube - in the past most of the key sessions were published on Youtube which can be a good source to learn more about this technology.
In this post, the focus is on the next part of the series, which is getting started by creating your own Docker image with Oracle 18c XE database installed and configured inside. First, a basic setup will be covered and then over the next posts this will be modified and we'll make it a little more complex and flexible, like using Docker Volumes. But before we get into that, let's jump in and create a Docker Image with 18c XE installed.
The process followed here is to create a Dockerfile with all the required instructions and start a build process to create an image based on this file's contents. As mentioned in the previous post, think of it as a kind of recipe or cook book to build the Docker image. To help you follow along, we've broken down the process into a few steps.
We recommend keeping scripts and components organized in a specific directory structure - and with Docker scripts there is no exception. The structure is described below:
1. We create a base directory - example “oracle-xe-18c” with the following sub folders “dockerfiles”, “scripts”, “software”. We download and copy all software that we will install into the software folder and all custom scripts that we might want to use in the image we stored in the scripts folder and then finally place the Dockerfile - or multiple Dockerfiles in the dockerfiles location. This is just a method used to keep things a little more organised. Note: If you are new to the “tree” command on Unix based systems, you should look into it as it can be really useful to show directory structures.
[/oracle-xe-18c]: tree .
.
├── build.sh
├── dockerfiles
│   └── Dockerfile
├── scripts
│   └── manage-xe.sh
└── software
    ├── oracle-database-preinstall-18c-1.0-1.el7.x86_64.rpm
    └── oracle-database-xe-18c-1.0-1.x86_64.rpm
2. Inside this directory structure we will have a few files - the two files you must download from the Oracle site as mentioned in the first post should be placed in the software sub directory - these files are:
3. In this example, we will use one Dockerfile located under the”dockerfiles” folder. We will go into a lot more detail regarding the contents of this file in the next section.
4. The script folder contains any scripts that are normally used in the docker image or during the build process. In this case we will use one script called “manage-xe.sh” which will perform a few basic tasks such as starting the required services on launching a container from the newly created image.
5. The last part to mention is the “build.sh” script - and this script will simply contain the “docker build” command to build the image - based on the specified Dockerfile. Now you can just run this command and not worry about having this script, but why type the commands when you can just run this?
Now this will be a big section where we will show a basic Dockerfile used to create the default Oracle 18c XE database called XE. In the next blog post, we will customise this to create a more complex custom configuration.
There are two things to highlight first. When you create a Docker file, each instruction adds another storage layer on the image. So the general rule is to bundle instructions together and keep them to the minimum, keep images as small as possible - and there is a good reason for this, but sometimes, having one or two extra instructions for clarity can be a good thing. You will see a few instructions used, but two key ones are “COPY” and “RUN”.
In summary:
The Dockerfile to create the default XE database:
##
#  First we select our base image that we will use to build from.
#  in this case we will use Oracle Linux 7.6
#
FROM oraclelinux:7.6

##
#  Then we provide some basic information - you can customise this to your need, but
#  I just add my email here
#
MAINTAINER anton.els@dbvisit.com

##
#  We are now switching to the root user as the next steps will require root permission
#
USER root

##
#  First we add the “oracle”  Unix user and groups and assign a password to the user
#  note - you will have to make this password more complex in production configurations
#
RUN groupadd -g 501 oinstall \
  && groupadd -g 502 dba \
  && groupadd -g 503 oper \
  && useradd -m -g oinstall -G oinstall,dba,oper -u 501 oracle \
  && echo 'oracle:Kiwi123' | chpasswd

##
#  now as Pre-requisite for the Oracle 18c XE Install
#  a few extra packages are required - and as I use tools like tree, which and sysstat
#  we add them here as well.  You can customise this, but “file” and “openssl” must be installed
#  before you can install Oracle 18c XE.
#  We also want to keep the image small, so to do this we cleanup after the install and remove
#  all temporary files and install caches using during installation
#
 RUN rpm --rebuilddb \
 && yum -y install file openssl lsof sudo sysstat tree wget which  \
 && yum clean all \
 && rm -rf /var/cache/yum/*

##
#  Update sudoers to allow the Oracle Unix user to run commands as the root user.
#  In this example I keep it simple and allow the user to execute any command without a password
#  but for production configurations you might want to look at locking this down more.
#  We also create a few directories and make sure the Oracle Unix user own them.
#  First the directory /opt/oracle in which Oracle 18c XE will be installed into
#  Second we create the /install folder which will be a temporary location from where we will install files
#  Third we create a bin directory in the Oracle user home folder location - where we can place scripts
#
RUN echo "oracle ALL=(ALL) NOPASSWD:ALL" >> /etc/sudoers \
  && echo "Defaults !requiretty"  >> /etc/sudoers \
  && mkdir -p /opt/oracle \
  && mkdir -p /install \
  && mkdir -p /home/oracle/bin \
  && chown -R oracle:oinstall /opt/oracle \
  && chown -R oracle:oinstall /home/oracle/bin

##
#  Next, we copy the Oracle 18c XE software to the install directory followed by
#  setting the ORACLE_DOCKER_INSTALL=true environment variable before we install
#  the Oracle 18c XE software with “yum -y localinstall” command.
#  The ORACLE_DOCKER_INSTALL variable is used to indicate we are installing into Docker
#  and as part of the pre/post install scripts Oracle will use this to remove/unset settings
#  which is not required when using Docker
#  on the last part we clean up the install folder and any temporary files
#
COPY software/oracle-database-preinstall-18c-1.0-1.el7.x86_64.rpm /install
COPY software/oracle-database-xe-18c-1.0-1.x86_64.rpm /install/
ENV ORACLE_DOCKER_INSTALL=true
RUN cd /install \
 && yum -y localinstall oracle-database-*18c*  \
 && yum clean all \
 && rm -rf /var/cache/yum/* \
&& rm -rf /install/oracle*.rpm

##
#  Next we specify which ports we want to expose for Oracle when a container
#  is created from this image.  We pick the defaults for the listener and EM Express
#
EXPOSE 1521 5500

##
#  Now in this example, we will use the default configure option and during my
#  testing I found that for Docker I had to remove memlock options from
#  the /etc/security/limits.d/oracle-database-preinstall-18c.conf file
#
#  Creating the XE database:
#   - Now this is done by running the "/etc/init.d/oracle-xe-18c configure” command
#     but this command expects input for user passwords, now two are required and
#     the second is just confirmation of the first.  This password is for the
#     SYS, SYSTEM and PDBADMIN users - they will all use the same one.
#     printf is useful here to “pass” the password into the configure command so that
#     no user interaction is required.
#
#
RUN sed -i -e "s/^.*memlock.*//g" /etc/security/limits.d/oracle-database-preinstall-18c.conf \
 && printf Kiwi123\\nKiwi123\\n  | /etc/init.d/oracle-xe-18c configure

##
#  We now add an entrypoint script.  There is a lot of information on Entrypoint
#  and CMD options in the docker documentation for more reference.  But in this example
#  We will copy a script called “manage-xe.sh” to the /home/oracle/bin folder which is
#  executable by the Oracle Unix account and this will be used to start the Oracle 18c XE
#  database on launch of the container
#
COPY scripts/manage-xe.sh /home/oracle/bin
RUN chown oracle:oinstall /home/oracle/bin/manage-xe.sh \
  && chmod 775 /home/oracle/bin/manage-xe.sh

##
#  We now switch to the “oracle” user as up to this point all operations were performed as
#  the root user.  We also specify the work directory - which in this case is the default
#  oracle user home folder location
#
USER oracle
WORKDIR /home/oracle

##
#  Something really useful is to set current environment for the oracle user.
#  This is done using the ENV command. With this we specify the core parameters that will
#  make things simpler for the “oracle” unix account, example setting the PATH, ORACLE_HOME
#  ORACLE_SID etc.
#
ENV ORACLE_DOCKER_INSTALL=true \
    ORACLE_BASE=/opt/oracle \
    ORACLE_HOME=/opt/oracle/product/18c/dbhomeXE \
    PATH=/home/oracle/bin:/opt/oracle/product/18c/dbhomeXE/bin:$PATH \
    NLS_DATE_FORMAT="dd/mm/yyyy:hh24:mi:ss" \
    ORACLE_SID=XE

##
#  We clear bash history to keep things clean - this is optional
#
RUN history -c

##
#  The last instruction is to specify what will be executed when the container is created
#  from the image.  There are a few options, you could just start a bash shell and then
#  manually start the Oracle 18c XE database, or, you could call the custom manage-xe.sh
#  script with the “start” parameter to start the listener and XE database on container
#  creation (run time)
#
# CMD ["/bin/bash”]
#
CMD ["/home/oracle/bin/manage-xe.sh", "-o", "start"]
The mange-xe.sh script is used to mainly start the XE database when a container is created and running. Note that this script is just an example to get you started and for production use you probably want to update this script to include a lot more detail and error handling
#!/bin/bash -e
# Basic script to manage XE database options
# set -x

############
#  Function to echo usage
############
usage ()
{

  program=`basename $0`
cat <<EOF
Usage:
   ${program} [-o start|stop] [-h]

   Options:
     -o start or -o stop will start or stop the Xe database and listener
EOF
exit 1
}

###########################################
#  Function to change database environments
###########################################
set_env ()
{

   REC=`grep "^${1}" /etc/oratab | grep -v "^#"`
   if test -z $REC
   then
     echo "Database NOT in ${v_oratab}"
     exit 1

   else
     echo "Database in ${v_oratab} - setting environment"
     export ORAENV_ASK=NO
     export ORACLE_SID=${1}
     . oraenv >> /dev/null
     export ORAENV_ASK=YES
   fi

}

####################################
#  setup_parameters Function
####################################
setup_parameters ()
{

  ## This function will set the Oracle Environment to XE using “oraenv” - see set_env function
  ## it will then update the listener.ora and tnsnames.ora to use the docker container hostname
  ## which will allow you to start the listener and do remote connections.
  ##
  set_env XE
  TNS_ADMIN=${ORACLE_HOME}/network/admin
  EDITOR=vi
  NLS_DATE_FORMAT="dd/mm/yyyy:hh24:mi:ss"

  if [ -e ${TNS_ADMIN}/listener.ora ]; then
    sed -i -e "s/^.*HOST.*/\ \ \ \ \ \ \ (ADDRESS = (PROTOCOL = TCP)(HOST = $HOSTNAME)(PORT = 1521))/" ${TNS_ADMIN}/listener.ora
  fi

  if [ -e ${TNS_ADMIN}/tnsnames.ora ]; then
    sed -i -e "s/^.*HOST.*/\ \ \ \ \ \ \ (ADDRESS = (PROTOCOL = TCP)(HOST = $HOSTNAME)(PORT = 1521))/" ${TNS_ADMIN}/tnsnames.ora
  fi

  ## Echo back the hostname and IP. - this is just informational
  ##
  echo $HOSTNAME - $(echo $(ip addr show dev eth0 | sed -nr 's/.*inet ([^ ]+).*/\1/p') | cut -f 1 -d '/')
}

####################################
#  enableDBExpress Function
####################################
enableDBExpress ()
{

## This is needed to allow DBExpress, we set the environment to XE then run the updates
##
set_env XE
sqlplus / as sysdba << EOF
  exec dbms_xdb_config.setlistenerlocalaccess(false);
  exec dbms_xdb_config.setglobalportenabled(true);
  exit
EOF
}


###################
###################
## Main Section
###################
###################

## We check for input parameters if not we display usage, if we get the expected arguments example
## -o start we continue

if test $# -lt 2
then
  usage
fi

## Get all input values
while test $# -gt 0
do
   case ${1} in
   -o)
           shift
           v_option=${1}
           ;;
   -h)
           usage
           ;;
   *)      usage
           ;;
   esac
   shift
done

## Call function to update listener and tnsnames
setup_parameters
##
# execute what is needed, start or stop the XE database
# when starting the XE database we will continue to tail the alert log
#

case ${v_option} in
"start")
          sudo /etc/init.d/oracle-xe-18c start
          enableDBExpress
          tail -F -n 0 /opt/oracle/diag/rdbms/xe/XE/trace/alert_XE.log
          ;;
"stop")

          sudo /etc/init.d/oracle-xe-18c stop
          tail -50 /opt/oracle/diag/rdbms/xe/XE/trace/alert_XE.log
          ;;
esac
Now the last step if you have the software Dockerfile and manage-xe.sh script in place, is to start the build process. It is important that you know this step will take time. In my case this took about 15min. Remember the process is not just installing XE, but it is also creating the database.
IMPORTANT: Please note in this example we are placing the database files inside the image, so if you create a container and remove it, the database will be gone with that container. We are not using Volumes yet. This method of placing the datafiles inside the image is not ideal, but in some scenarios this works perfect - especially for testing, where you might not care about the data persistence. Volumes will be covered a lot more in the next two blog posts.
To build the image, you can run the following command:
docker build -f dockerfiles/Dockerfile -t oracle-db:18cXE .
Now we added this to the build.sh script and the build.sh script looks like this:
#!/bin/bash
docker build -f dockerfiles/Dockerfile -t oracle-db:18cXE .
The build command is well documented and really easy. The key is you provide a dockerfile as input and using the -f flag you can specify the specific Docker file to use as you might have more than one. Then the tag - or name of your image is specified using the “-t” flag option - and in this case we just called the image “oracle-db:18cXE”. The last thing you must add to the build command is the dot “.” Which means use the current directory as the build base.
Do not be scared when you see a lot of output on the screen as the build is running. You will be provided a lot of feedback (output) while the different instructions in the Docker file are executed.
Once complete, which can take a few minutes (in this configuration it took about 10-15minutes), you can use the "docker images” command to list your newly created container: Example:
$ docker images oracle-db:18cXE
REPOSITORY          TAG                 IMAGE ID            CREATED             SIZE
oracle-db           18cXE               84a5a13189ac        3 minutes ago       12.8GB
The next part is to start the container from the image just created. This is done with the “docker run” command, which as with most Docker commands - there are a large amount of options available.
In this example we want to get an interactive terminal so we use the “-it” flags. Then specify to map port 1521 from the container to 1521 on the localhost, as well as port 5500 to port 5500 on the localhost - this is done using the -p flag. Then specify a more user friendly hostname for the container using the “-h” flag and the “—name” flag is used to give it a more user friendly container name. In both cases use the devXE name. The command run is as follows:
docker run -it -p 1521:1521 -p 5500:5500 -h devXE --name devXE oracle-db:18cXE
Now when running this you will get output of the database being started and it will appear to hang - do not worry, all it is doing is keeping tailing the XE alert log. Example:
$ docker run -it -p 1521:1521 -p 5500:5500 -h devXE --name devXE aelsnz/oracle-db:18cXE
Database in  - setting environment
devXE - 172.17.0.2
Starting Oracle Net Listener.
Oracle Net Listener started.
Starting Oracle Database instance XE.
Oracle Database instance XE started.

Database in  - setting environment
update settings to allow DBExpress Access

SQL*Plus: Release 18.0.0.0.0 - Production on Wed May 8 09:10:35 2019
Version 18.4.0.0.0

Copyright (c) 1982, 2018, Oracle.  All rights reserved.

Connected to:
Oracle Database 18c Express Edition Release 18.0.0.0.0 - Production
Version 18.4.0.0.0

SQL>
PL/SQL procedure successfully completed.

SQL>
PL/SQL procedure successfully completed.

SQL> Disconnected from Oracle Database 18c Express Edition Release 18.0.0.0.0 - Production
Version 18.4.0.0.0


<——— this is where it will appear to hang, but it is not, we are just tailing the database alert log here.

To cancel or close the container - just press cntr-C to cancel out and the container will be stopped.
BUT before you do that, look at the next step and test your new container.
Also keep in mind you can use the “-d” flag as part of the run command to run in background.
You can still use the "docker logs" command to view the output of this container.
As we mapped port 5500 from the container to my localhost where Docker is running, we can open a browser and navigate to https://localhost:5500/em/login and get access to the Database Express console, example:
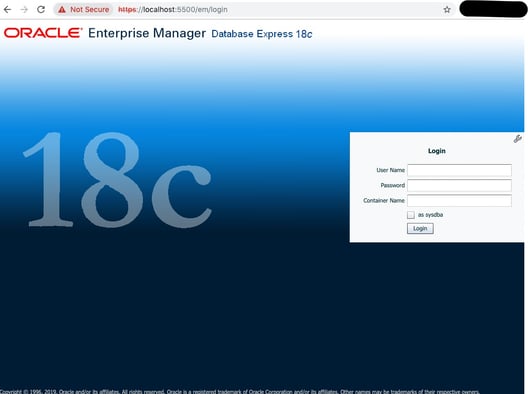
There are two things you can test now, one is to connect to the database instance using any client like SQLDeveloper or even just good old SQL*Plus. Now in this example we will use sqlplus and assume the default port (1521) which we are using and which is mapped from the container to local port 1521.
$ sqlplus /nolog

SQL*Plus: Release 12.1.0.2.0 Production on Wed May 8 21:13:42 2019

Copyright (c) 1982, 2016, Oracle.  All rights reserved.

SQL> connect system/Kiwi123@localhost/XE
Connected.

SQL> select instance_name, host_name, version, edition from v$instance;


INSTANCE  HOST
NAME      NAME                VERSION    EDITION
--------- ------------------------- ---------- -------
XE      devXE             18.0.0.0.0 XE

SQL>
As you can see we were able to connect and select some detail from v$instance.
We have covered a lot in this post, and hopefully you now have an idea of how you can create your own Docker image running Oracle 18c XE database inside it. The nice part of all this is you can cancel the container, remove it and just create a new one from the image. Test connecting to your XE database running inside the container, remove the container and try again (you might need to clean up the old containers - remember to look at the commands "docker ps -a” and the option of using “docker run --rm” flag.
In the next post we will look at how we can customise the Dockerfile and create our own XE database that is not called XE and is not even a Container database with pluggable databases… but more on this later.