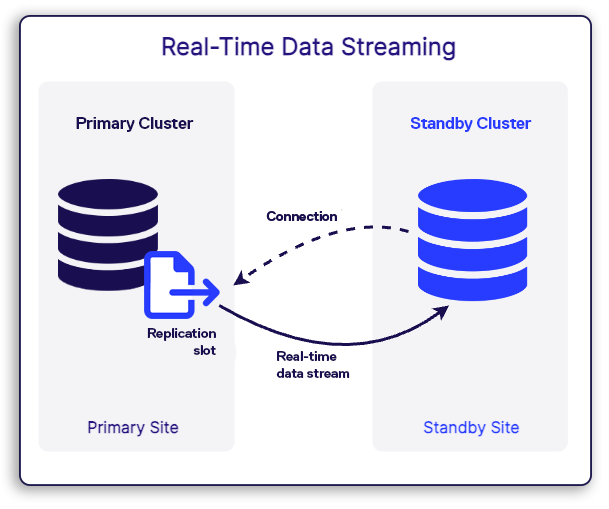
Today we will discuss how to set up Disaster Recovery (DR) for PostgreSQL by creating a real-time data streaming link between the primary and standby clusters with Dbvisit Standby MultiPlatform. This option is ideal if you are looking for zero data loss between the two clusters. To do this without Dbvisit StandbyMP, you would need to manually edit/set up multiple configuration files, manage file permissions, and write custom monitoring scripts to see the status of your DR configuration.
PostgreSQL Actions
A couple of steps should be done before WAL Streaming can be set up using StandbyMP – Setting up a replication user, setting up client authentification in pg_hba.conf, and confirming the level of data written to WAL in wal_level.
1. Setting up a replication user.
This step is necessary only if you are planning to use a specific user for replication (which is recommended). Provide additional role pg_read_all_stats to the user ( Grant the role is specific to Dbvisit).

2. Ensure the pg_hba.conf files have entries for replication. This allows the servers to establish a connection between each other for replication. I have added two entries to ensure there is a connection from standby to primary after the switchover. This would require a restart of the primary cluster.
![]()
3. One last and important parameter that must be checked before proceeding with creating a standby cluster using Dbvisit is to ensure that the parameter wal_level is set to “replica” in postgresql.conf file. This value is set by default to “replica” from version 10 of PostgreSQL onwards – incidentally, this is the earliest version Dbvisit supports.
Installing and Configuring Dbvisit StandbyMP
Now let’s look at steps from StandbyMP Dbvisit. The very first step is to create a configuration before creating a DR cluster.
Step one: create a configuration
Click “New Configuration” in the left sidebar, and select PostgreSQL from the Database Platforms list.
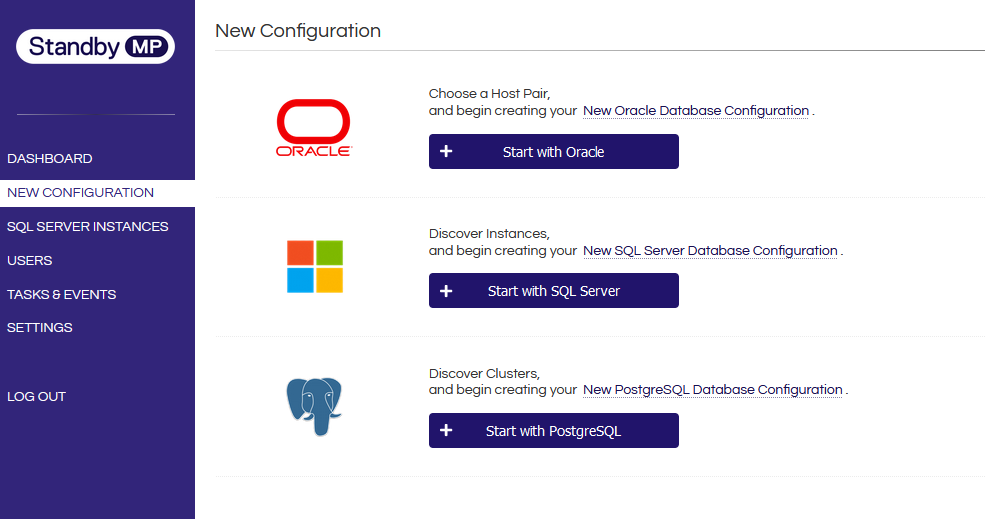
Now, select the primary host – this is where the source cluster is located. You will see various helpful information appear about the Primary host: any detected PostgreSQL installations, port numbers, cluster information (including any user-created databases), etc. Make sure you select the cluster port number and installation directory that you intend to create the DR configuration for.
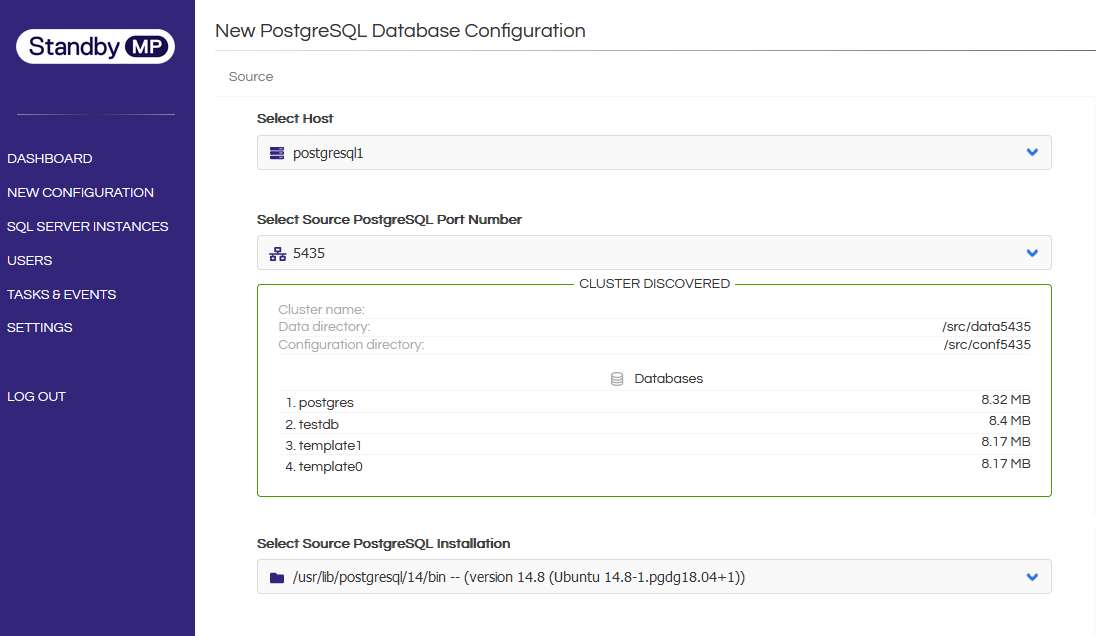
Select your standby host – this is where you intend the standby cluster to reside. PostgreSQL should already be installed, however the cluster should not be running.
Finally, simply enter the name for the new configuration, and of course your Dbvisit licence key.
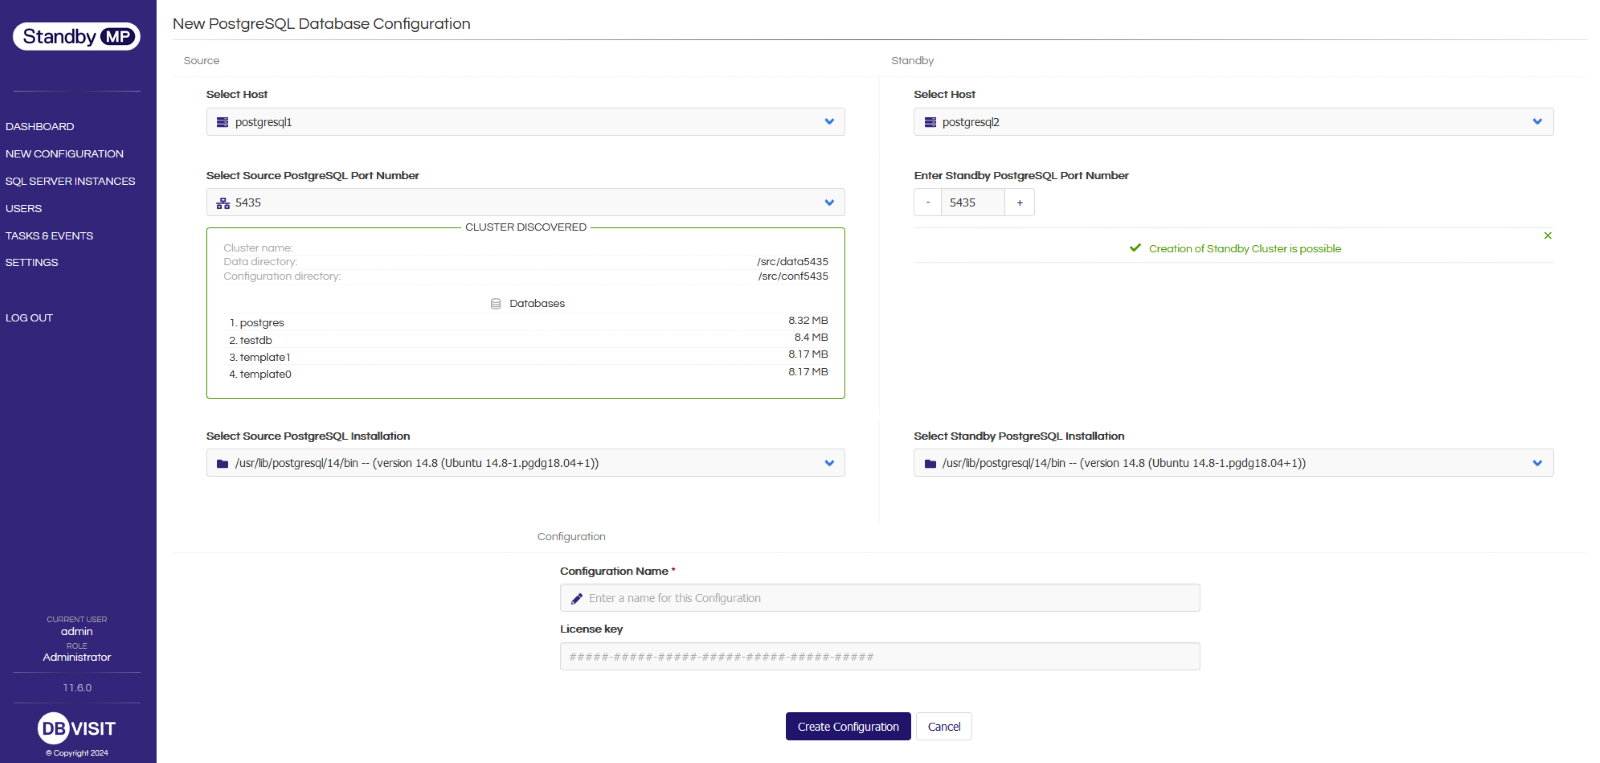
Your DR configuration is ready to go! Now, we just need to set up the real-time data streaming.
Note: StandbyMP can also work with existing configurations – here this step would detect and configure your existing streaming configurations.

[Figure 1 - Configuration PG5432]
Step two: click “Set up now”
StandbyMP pre-populates all areas with best-practice settings. The key advantage here is you don’t need to flip through multiple windows and fill up additional data or need to know any more information from the production cluster (other than your replication user and password) to finish creating the standby cluster.
SETUP SCREEN ONE
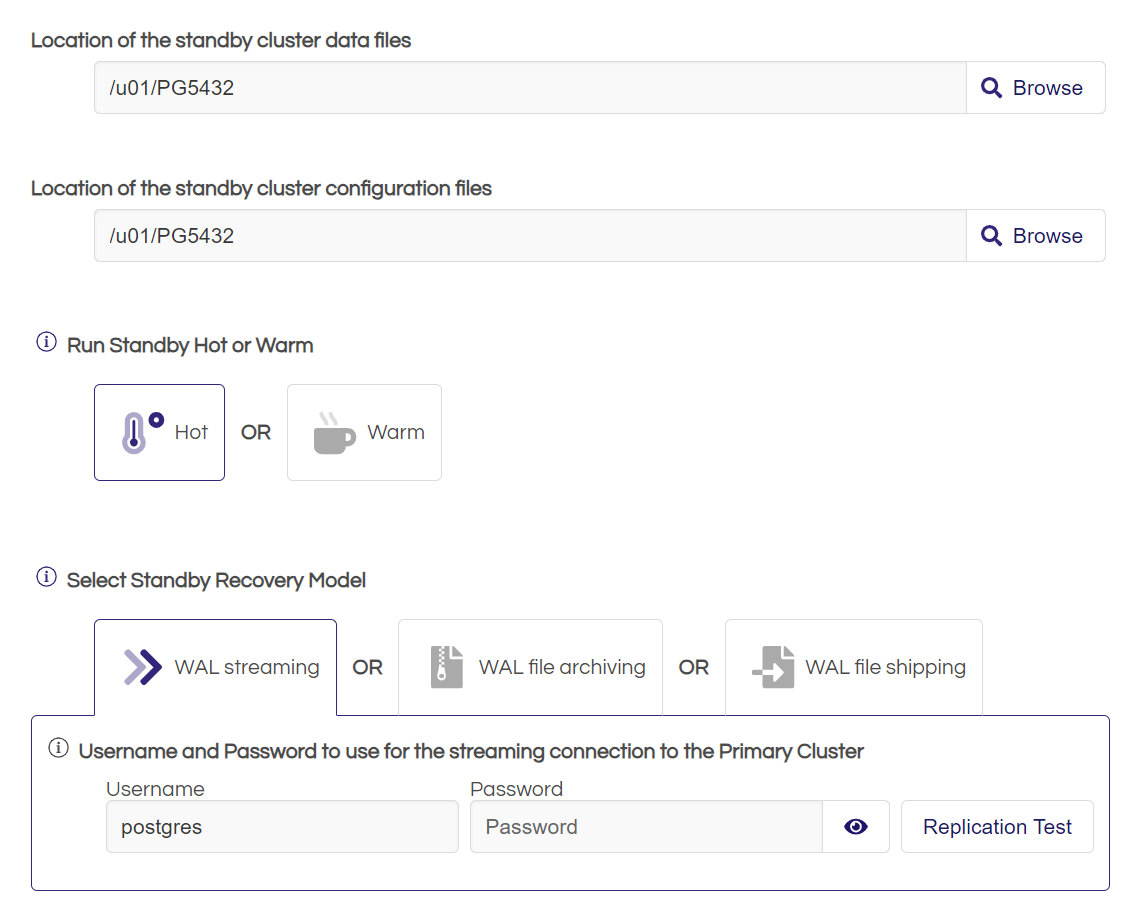

The location of your data files and configuration files for your DR cluster would be automatically set to the same location as your primary cluster (This is a best practice for creating DR to ensure consistency between your Production and DR).
The observer is a standby monitoring tool within StandbyMP, and we recommend that all users enable it. Doing so ensures that your DR configurations are monitored, and any issues with your DR will be reported.


At any time during or after the creation, you can click the task on the control center and see the real-time status of the task. In this example, the task has been completed, and all actions were completed successfully.
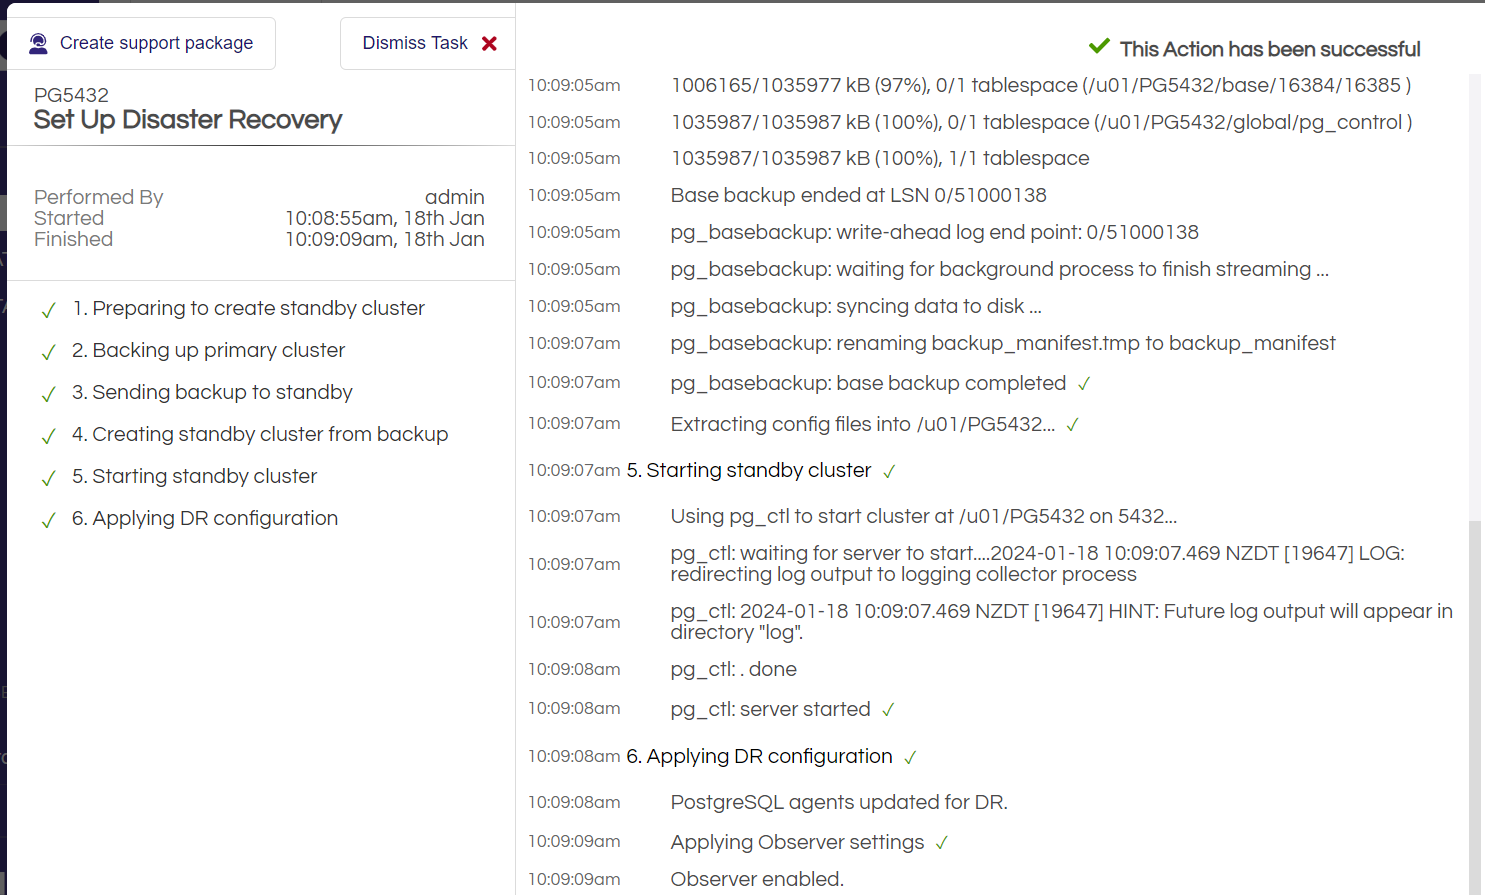
Quickly finding the status of the streaming
Select your standby host – this is where you intend the standby cluster to reside. PostgreSQL should already be installed, however the cluster should not be running. The StandbyMP GUI allows you to check the status of all configurations at a glance from the dashboard. All information on the dashboard is presented in real time.

Alternatively, we can find the streaming status using psql commands.
Run the below sql from Primary:

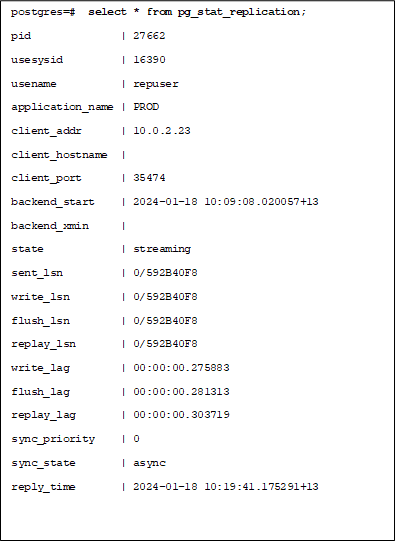
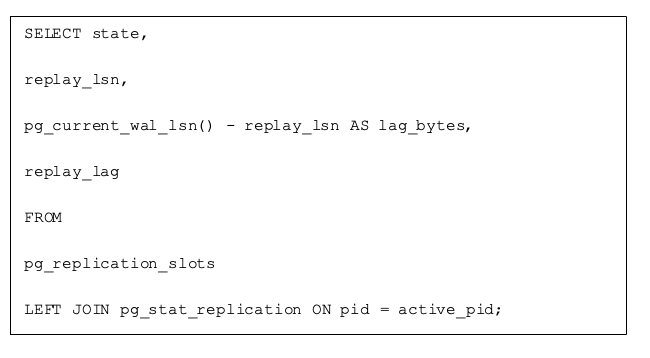
The simplest method is to get it directly from the central console dashboard. Instead of running the above queries by logging into the server.

We can now easily see the benefits of having StandbyMP for setting up your PostgreSQL streaming replication.
-
The steps are straightforward, guided, fast and easy.
-
Very few prerequisites for installation.
-
Easy and faster to manage multiple environments.
-
Better DR status visibility by enabling a check of all configurations from the central dashboard.
-
Better DR status visibility with daily heartbeat notifications.
-
Get Immediate notifications for any issues in your Sync sync status directly from GUI, Slack, and email.
-
No manual intervention or monitoring is required.
If you have any questions or would like to organize a POC with one of our technical specialists, contact us today!

Subscribe to our monthly blog updates
By subscribing, you are agreeing to have your personal information managed in accordance with the terms of DBVisit's Privacy Policy


